Vintage MG Parts - Parts Site for the MMM Enthusiast
Richard's Pattern Making Blog
Day 9 - Tuesday, 4th June 2013:
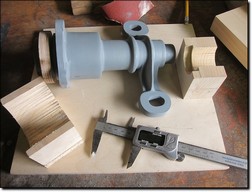 Now onto the base for the odd side pattern making process
This is where it gets a little more fiddly. We need to suspend the grey pattern off the base board and effectively build a platform around it. The perimeter of the platform has to pass around the midpoint on the grey pattern and at the point where sand can be lifted off the pattern without any undercutting i.e. where the pattern would otherwise be locked by the sand, preventing it from drawing out.
I have therefore made a couple of saddle supports.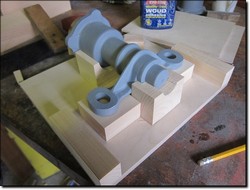 Pattern supported. The eye platforms are also supported to create a fixed raised platform.
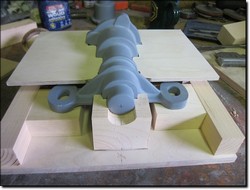 The surround is to be a very close fit to the grey pattern. I have achieved this by using a contour gauge
The majority of this work is done using just the bandsaw and a large disc sander.![]()
Day 11 - Thursday, 6th June 2013:
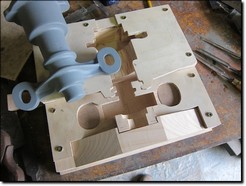 Several followers have emailed to say that they don't quite understand what this second pattern is all about.
I am hoping that the foundry will take some photos of the sand molding procedure, similar to the Volumex 7 Fin manifold casting exercise we undertook three years back (see Volumex page for the full pattern making and casting process). I will run a commentary, so it will hopefully all make sense then. It is not easy to explain!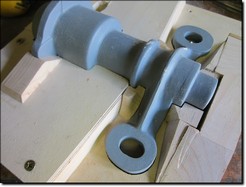 Note, the cross brace is set lower in the molding board as I need to establish the point around the grey pattern where it will draw out of the sand. Also note, the bolt pads on the engine mounting flange are at an awkward position and so at the nearest side I have raised the joint line by adding a block. For the other side (very top of this photo) I have had to chissel down to the joint line. If I do not do this then the pattern will not draw out of the sand.
There will be no progress to report tomorrow night sadly, as well as it being a Friday night feet up with a beer in hand, it is my birthday so I am going to put my feet up and have two beers instead!![]()
Day 12 - Saturday, 8th June 2013:
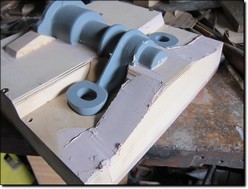 Car body filler is now applied to all joints so a totally smooth pattern will be produced. This will assist the moulder at the foundry when the whole pattern is to be extracted from the sand.
The filler is then rubbed down.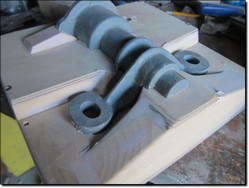 I have then applied filler around the apperture of where the grey pattern fits into position in the base. I have coated the grey pattern with a release agent to prevent filler from bonding to the pattern. It is then pushed firmly into position. Any excess filler which is squeezed out is scraped off (see around the base of the eye section). The filler is allowed to set before the pattern is removed. Any loose traces of filler around the joint line are then carefully sanded off to create the perferct point of contact around the pattern. The better the fit, the less chance of achieving a messy joint line on the final casting.
![]()
Day 13 - Sunday, 9th June 2013:
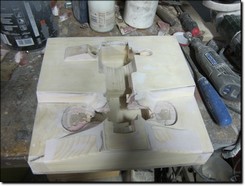 The joint line is carefully inspected with minor filling where necessary.
I have so far build up this pattern with 90 degree sides as it is a little easier to add the taper afterwords. Therefore, the whole base is placed on the tabe to the disc sander whereby the edges are sanded to create taper at five degrees.
The pattern is then coated with a solution of sanding sealer. Once dry, this is lightly sanded down.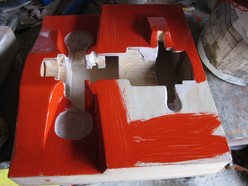 Now for painting with pattern paint. The first coat is applied fairly thick and then painted with thinners just before it starts to dry. This helps to achieve a super smooth finish.
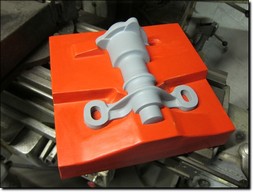 A second thinned coat of paint is then applied. Once dry, it is then rubbed with steel wool to achieve a super smooth satin finish
And here it is, the oddside pattern is finished. Well almost! If we simply asked the foundry to produce a casting from this pattern the grey part would be replicated as one solid lump which is no good to anyone as it has to be hollow. Therefore, tomorrow, I will be starting to make the final part of the pattern which is the core box.
The core box effecticely is a mould which allows a long bar of sand to be produced. This will then be inserted in the sand mould. Hang in there blog watchers as it will become very clear shortly!![]()
