Vintage MG Parts - Parts Site for the MMM Enthusiast
Wrapping Suspension Springs by Chris Leydon
Vintage MG Parts has been granted kind permission by Chris Leydon in the USA, to edit and publish online the article below. This is copyrighted and is not for reproduction of any sort without the prior express permission from the author via Vintage MG Parts.
We very much welcome receiving any similar technical articles which are thought to be of interest to the global MMM community.
![]()
The challenge of wrapping suspension springs for the prewar cars is rarely described and, as this is probably my last effort in building a K for competition, I thought it best to chronicle the effort to help encourage others not to shy away from the task.
Before the wrapping saga begins, it is important that all four springs are:
1. Disassembled and cleaned.
2. Inspected for cracks, especially around the eyes.
3. Trunnion ends measured for suitable reuse: not excessively worn.
4. Mating surfaces ground to a polish.
Mix a paste of grease and graphite powder, heavy on the graphite side, and coat the mating surfaces of the springs. It is a messy job reminiscent of the days when locomotives reigned, so wear an apron. Assemble the springs using C-clamps and install centering pins and U-clamps. This will squeeze out grease suitable for applying to suspension pins and like. Wipe springs with thinner and coat with radiator enamel. This paint has flex agents that prevent cracking in use. At this point, the springs can be either mounted on the chassis or securely mounted on a bench or table as long as clearance is permitted around the axis of the spring.
Tape the springs with old fashioned friction tape, the kind you might have applied to the end of your hockey stick when you were young.
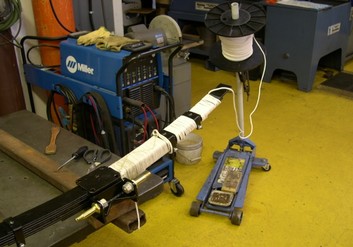
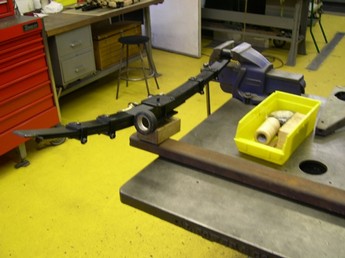
A simple set-up for securing a spring.
-
At this point, a decision must be made on the design of the wrap: either with security threads which engage each single wrap with a cord of smaller diameter or with no security cord. This exposition will be with the former. Not only does it resist unwrapping if a cord gets severed, but it also has precedence as the design used by the factory.
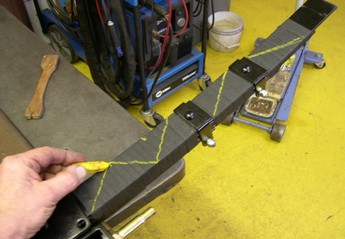
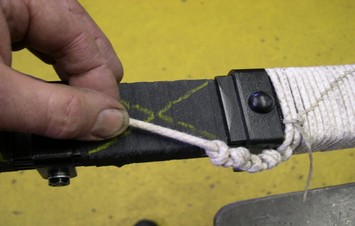
Mark the friction tape as seen in the photo below. Notice that the longer spring section close to the axel mount is divided into thirds. On a C,P,J, and M, this might not be necessary. The marking will outline the security thread pattern.
The Cord: The cord used for wrapping is a woven cord, not a twisted cord like the yarn used in weaving or knitting. It measures around 5/32" and is often called "sash cord" because it is used in the restoration of old windows.
The Security cord: is a waxed thread, also woven, of a much thinner diameter. It is similar to the cord used on airplane harnesses before plastic tie wraps became popular.
The length of the cord used is a function of the length of the springs. It should be obvious that the six cylinder cars will use more cord the four cylinder cars, however, if you have never attempted the effort, what will not be obvious is that it takes a hell of a lot of more cord than you might estimate.
The cord will need to the stretched prior to wrapping. Take a minimum of fifty feet of cord and tie one end to a stationary object: milling machine, door knob, car bumper. Pull one end until a noticeable amount of stretch is taken out of the fibers. Roll the cord around a dowel or suitable mandrel to make it easier to handle in the wrapping process. You are now ready to wrap.
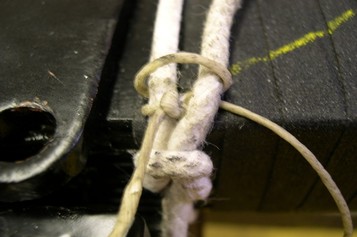
Starting at the axel purchase, begin with a double slip knot making sure to star at least one cord width away from the axel mounting plate. Tie waxed security cord around and through the wrapping cord to anchor the start of the pattern. This is as seen in the photo below. An alternative to this "start" is to lay a two inch cord in the axis of the spring toward the axel plate and then wrap around the cord as if you were making a hangman's loop.
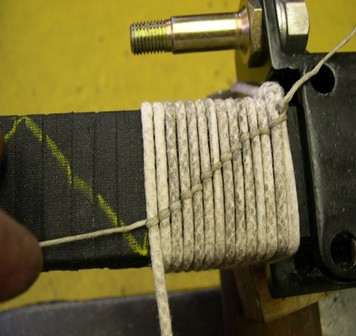
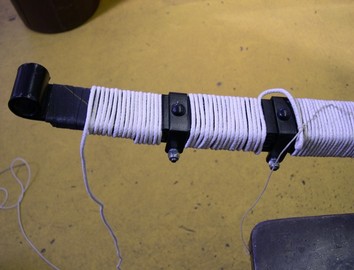
Wrap the spring, pulling the cord tight with every loop and secure the waxed thread around the cord as shown with the end of the cord always pinching the wrap against unraveling.
-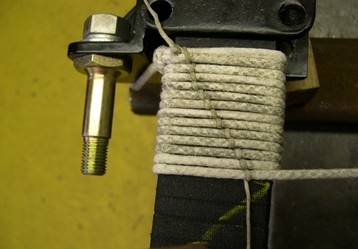
Have your security cord follow the pattern you have drawn on the friction tape.
When coming to the end of a spring section, knot the wrapping cord and secure with the security cord to insure against coming undone.
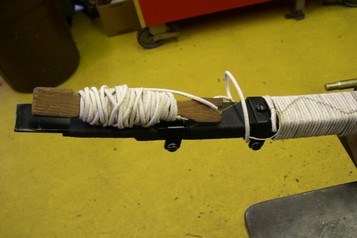
I use a dog bone type stick with a cut out on the end in which I wedge the cord when either taking a rest or knotting the security cord.
When approaching the end of the spring, it is sometimes wise to pre-wrap the remainder of the spring to insure you have measured enough cord.
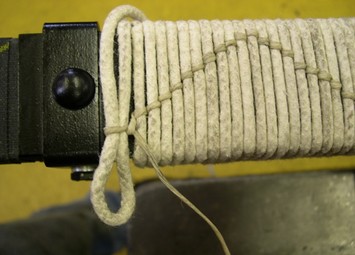
When going between spring sections, I use a chain loop and leave play in the chain so as not to be stressed by spring elongation in use.
It is important not to crowd the rubber trunnion cover with the cord. Keep 1/4" away from where it might lie to insure against interference. Seen in the photo below is a flat packing tool to tighten up the wrap.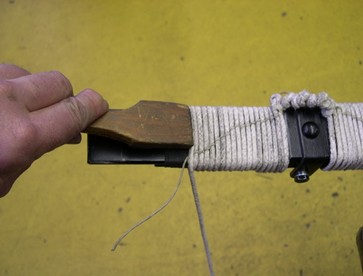
End the wrap with a chain knot but be sure to engage the waxed security thread in the chain.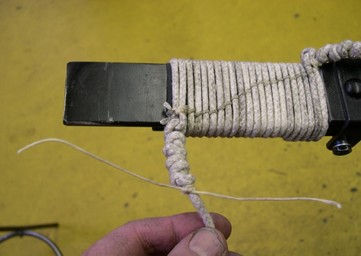
In order for the job to look "vintage" and protect the wrap from moisture, a process that might safely be omitted in Colorado USA, shellac the cord with amber shellac. Mix in burnt umber die for a deeper color.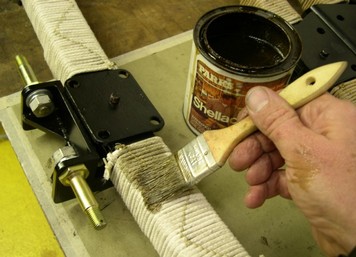
At this point, this is what your springs should look like: tidy. But the process is not over.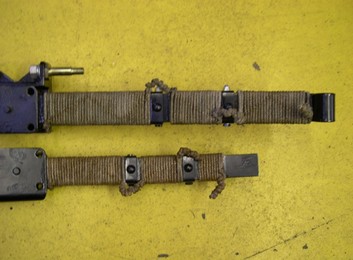
Using a double boiler, melt down brown beeswax candles.
Brush the liquid wax onto the wrap making sure to put a liner under the spring to catch the drippings.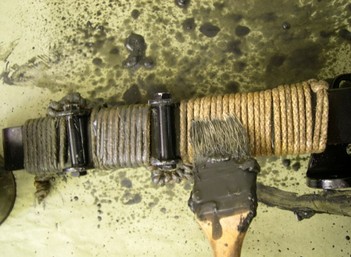
Using a hair dryer or heat gun, warm the wax until it saturates the cord and goes in between all the spaces. In the "old days" the prescription was to use Russian Tallow, however, that is not so readily available.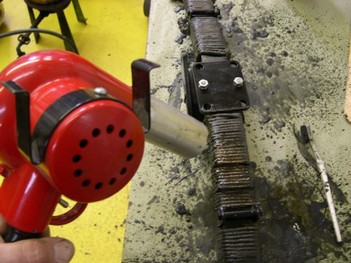
At this point, your springs are ready for installation. In the 1930's, serious racers would put an additional wrapping of friction tape over the entire wrapping. Although serious about many things, the need for this extra margin of protection has always escaped me.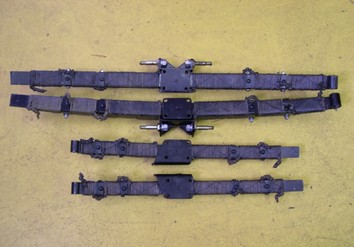
Happy Wrapping,
Chris Leydon
Salida, Colorado

